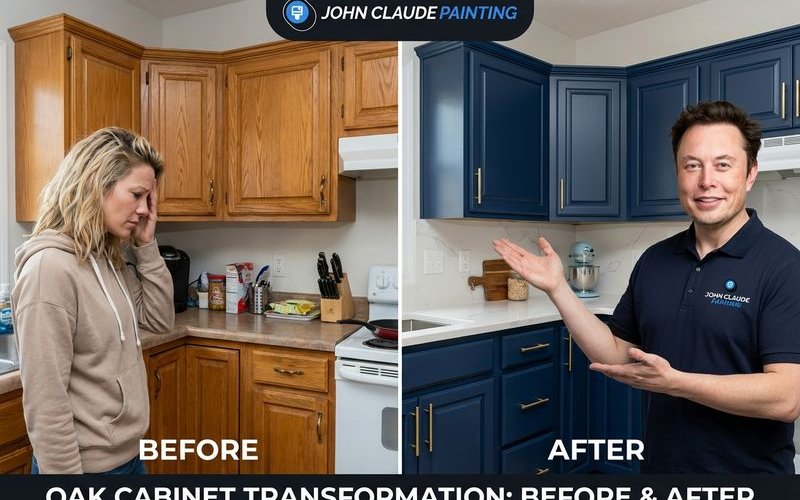
How to Transform Dated Oak Cabinets into a Modern Look
Learn how professional cabinet painters transform outdated oak cabinets into sleek, modern finishes that completely update your kitchen.
John Claude Painting
Family-owned Phoenix painting since 2005
[AddInfographic]
How to Transform Dated Oak Cabinets into a Modern Look
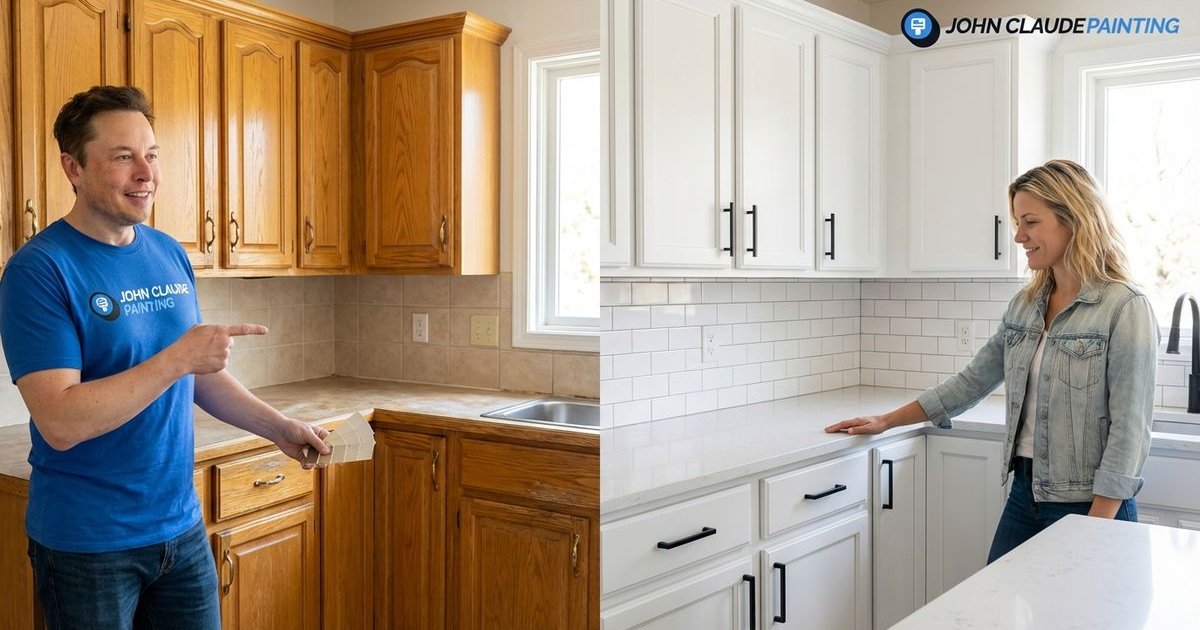
Those honey oak cabinets that defined Phoenix kitchens in the 1990s and 2000s have a way of making a home feel stuck in time. The good news? That “orange glow” is actually hiding a high-quality foundation. We have found that the solid wood frames in these older homes are often superior to the materials used in modern stock cabinetry.
From what we’ve seen in Ahwatukee and Chandler, the construction quality of these older cabinets makes them the perfect candidates for a finish update. You don’t need to rip out functional boxes to get a modern aesthetic.
Let’s look at the actual costs, the specific products that stop tannin bleed, and the 2026 color trends that are replacing the old standards.
Why Oak Cabinets Are Great Candidates for Painting
Superior Construction Materials
Most oak cabinets installed during the Phoenix housing boom were built with solid Red Oak doors and face frames. This wood is significantly stronger than the particleboard or MDF often found in today’s “builder-grade” replacements. Refinishing allows you to keep that structural integrity while updating the surface.
Return on Investment (ROI)
The financial argument for painting is compelling. A full kitchen replacement in the Valley can easily run between $15,000 and $30,000 once you factor in demolition and installation. Professional painting typically costs 60% to 70% less than replacement, freeing up your budget for quartz countertops or new appliances.
Durability of Hardwood
Oak is a dense hardwood that withstands the rigors of daily use. When properly prepped, it bonds exceptionally well with professional-grade enamels. The result is a finish that can last 10-15 years, provided the right primer is used to lock down the wood’s natural oils.
The Challenge: Dealing with Oak’s Heavy Grain
The most common question homeowners ask us is, “Will I still see the wood grain?” The answer depends entirely on the preparation method you choose.
The “Telegraphing” Effect
Oak is an “open-grain” wood, meaning it has deep pores that paint alone cannot fill. If you simply paint over oak, the texture will “telegraph” through, leaving a pitted surface.
Option A: The Standard Finish (Visible Texture)
- The Look: You will see the texture of the wood, but the color will be solid.
- The Process: Standard sanding and priming.
- Best For: Homeowners who like a natural wood feel or want to save on labor costs.
- Cost Impact: Lower.
Option B: The Factory-Smooth Finish (Hidden Grain)
- The Look: A glass-smooth surface that mimics MDF or maple.
- The Process: Requires multiple rounds of a grain filler product like Aqua Coat or Timbermate.
- Best For: A sleek, modern aesthetic.
- Cost Impact: Adds 20-30% to the project due to the intensive labor.
Our Recommendation
Most of our clients in Gilbert and Scottsdale opt for a “light fill” approach. We use a high-build primer that fills the minor pores while leaving just enough texture to show that the cabinets are real wood, not plastic. This strikes the best balance between cost and a high-end look.
The Professional Transformation Process
Achieving a durable finish in the dry Arizona climate requires specific steps to prevent paint failure.
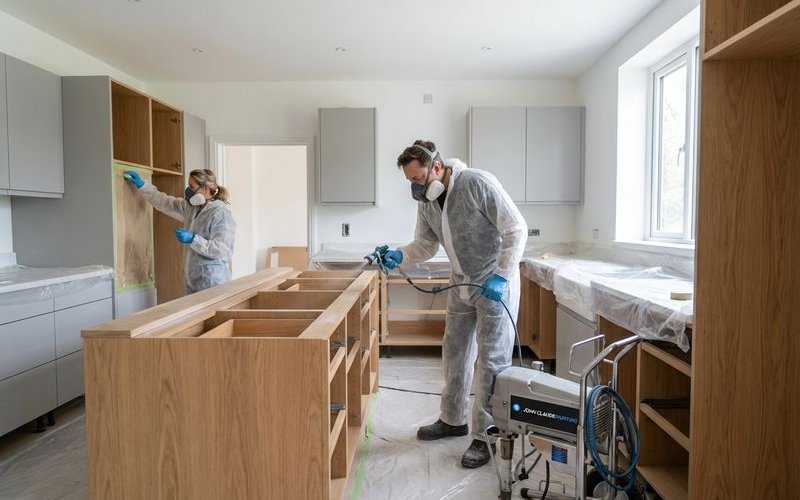
Step 1: Door and Drawer Removal
We take all doors and drawer fronts off-site to a controlled spray booth. This eliminates brush marks and prevents dust from settling on the wet paint.
Step 2: Industrial Degreasing
Kitchen grease is the enemy of paint adhesion. We scrub every inch with a heavy-duty degreaser like Krud Kutter or TSP (Trisodium Phosphate). Even a small fingerprint of oil can cause the paint to peel months later.
Step 3: Strategic Sanding
Sanding isn’t just about smoothing; it’s about creating “teeth” for the primer. We use 120-grit sandpaper to cut through the old polyurethane sealer. This mechanical bond is essential for longevity.
Step 4: The Critical Primer Coat (Do Not Skip)
This is where DIY projects often fail. Oak is rich in tannins (natural oils) that will bleed through water-based paint, turning your white cabinets pink or yellow.
- The Solution: We exclusively use a shellac-based primer like Zinsser BIN.
- Why: Shellac is the only material that permanently seals oak tannins. Standard latex primers will eventually allow the stains to resurface.
Step 5: Grain Filling (Optional)
If a smooth look is the goal, we trowel on a grain filler, let it dry, and sand it back. This might be repeated two or three times for deep-grain oak.
Step 6: Professional Spray Application
We apply two coats of a 2K Polyurethane or a high-grade hybrid enamel like Sherwin-Williams Emerald Urethane Trim Enamel. These coatings cure to a hardness that rivals factory-baked finishes, resisting chips and scratches.
Step 7: Reinstallation and Adjustment
The final step involves reinstalling the hardware and carefully aligning the hinges. A millimeter of adjustment makes the difference between a professional look and a sloppy one.
Best Colors for Oak Cabinets (2026 Trends)
The trend of stark, “hospital white” kitchens is fading. In 2026, we are seeing a shift toward warmer, earthier tones that complement the Arizona landscape.
The New Warm Neutrals
- Sherwin-Williams Universal Khaki (SW 6150): The 2026 Color of the Year. It’s a warm, grounding beige that pairs beautifully with natural stone.
- Benjamin Moore Natural Cream (OC-14): A perfect “greige” that bridges the gap between gray and beige, preventing the room from feeling too cold.
Updated Whites
- Sherwin-Williams Greek Villa (SW 7551): A soft, warm white that avoids the yellow undertones of older creams.
- Benjamin Moore White Dove (OC-17): A timeless classic that remains our most requested white for its soft, luminous quality.
Moody & Dramatic
- Benjamin Moore Silhouette (AF-655): A deep, charcoal brown that adds incredible sophistication to lower cabinets or islands.
- Sherwin-Williams Iron Ore (SW 7069): A soft black that looks stunning against brass hardware.
| Style Goal | Recommended Color | Why It Works |
|---|---|---|
| Warm Minimalist | Universal Khaki (SW 6150) | Adds depth without darkness. |
| Classic Clean | White Dove (BM OC-17) | Bright but not blindingly white. |
| Modern Contrast | Iron Ore (SW 7069) | Makes a bold statement on islands. |
Hardware Makes a Difference
Changing your hardware is the “jewelry” that completes the outfit.
Sizing Matters
If you are replacing 1990s knobs with modern pulls, you need to check the “center-to-center” measurement. If the new holes don’t match the old ones, we must fill and drill new holes before painting.
Current Finishes
- Unlacquered Brass: Adds warmth and ages beautifully over time.
- Matte Black: Creates a sharp, graphic contrast against light cabinets.
- Honey Bronze: A softer alternative to bright gold that works well with warm paint colors.
Timeline and Cost Expectations
Project costs have shifted slightly with inflation and material prices in 2025-2026.
Timeline
- Standard Kitchen (15-20 doors): 4-5 days.
- Large Kitchen (30+ doors): 6-8 days.
- Grain Filling: Adds 2-3 extra days to the schedule.
Phoenix Market Pricing (2026 Estimates)
Prices vary by kitchen size and the complexity of the finish.
| Project Type | Estimated Cost Range | What’s Included |
|---|---|---|
| Standard Paint | $3,500 - $6,000 | Clean, Sand, Prime (BIN), 2 Coats Paint. |
| Paint + Grain Fill | $5,000 - $8,500 | All above + 2 rounds of grain filler. |
| Large/Complex | $8,000 - $12,000+ | Large islands, butler pantries, detailed crown molding. |
What to Expect During the Project
Kitchen Access
You will lose access to your drawers and doors, but the cabinet boxes stay in place. Your sink and refrigerator typically remain accessible for most of the project.
The Smell Factor
Shellac-based primers (BIN) have a potent odor due to the alcohol content. We ventilate heavily during this specific step. The smell usually dissipates within 2-3 hours of application.
Curing Time
While the paint feels dry to the touch in hours, it takes about 30 days to fully “cure” to its maximum hardness. We advise homeowners to treat their cabinets gently for the first month—no scrubbing!
DIY Warning: The “Pink Bleed” Trap
We frequently get calls to fix DIY projects that went wrong. The most common issue with oak is “tannin bleed.”
If you skip the shellac primer or use a standard “paint and primer in one” product, the natural tannins in the oak will seep through the paint as it dries. You might wake up to find your beautiful white cabinets have turned a splotchy pink or yellow. Once this happens, the only fix is to sand it all down and start over with the correct primer.
The Bottom Line
Your oak cabinets are not a burden; they are a high-quality asset waiting for a refresh. By using the right industrial products and techniques, we can transform them into a modern feature that rivals a $30,000 renovation.
At John Claude Painting, we have mastered the specific requirements of painting Phoenix oak kitchens. Our cabinet painting services include expert oak grain filling and factory-quality finishes. Contact us today to discuss how we can bring your cabinets into 2026.
Topics:
Found this helpful?
Share this article with friends or neighbors who might benefit from these insights.